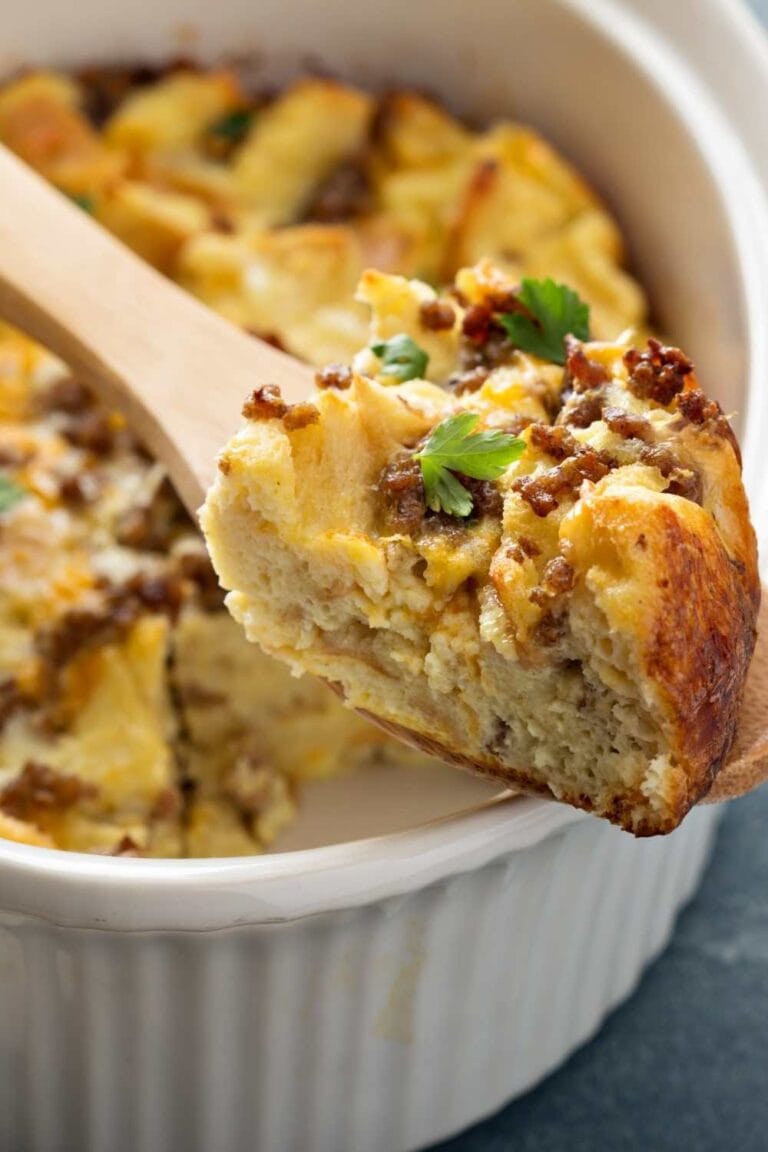
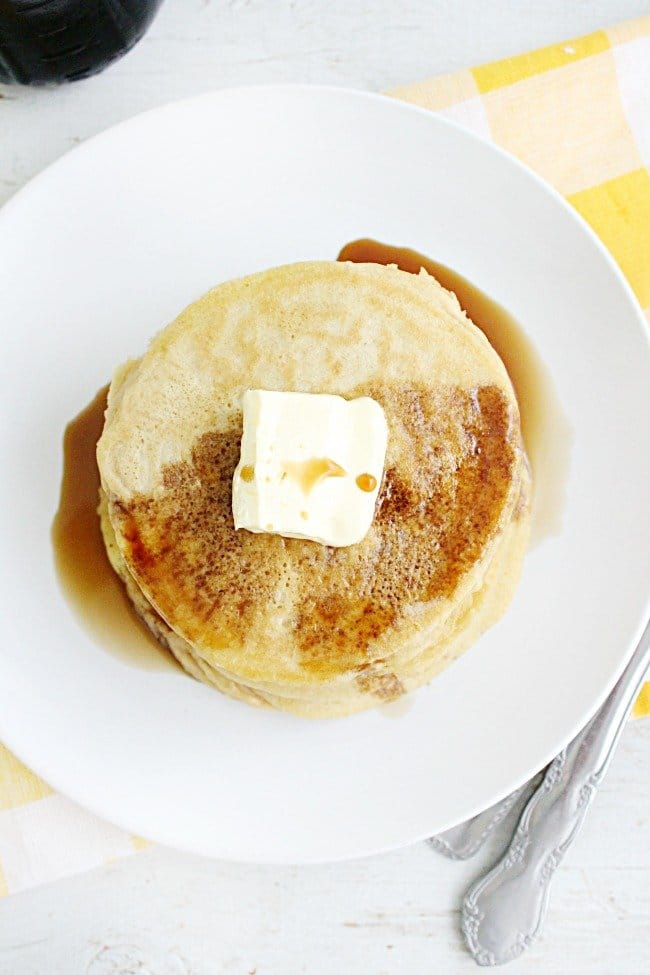
Ina Garten Buttermilk Pancakes
Assured to be the tastiest Ina Garten Buttermilk Pancakes you’ve ever had! Every time, this simple pancake recipe produces very tasty and utterly wonderful pancakes much more flavorful than a box mix! All you need to do is drizzle them with maple syrup and you’re ready to go.
Why You’ll Love This Ina Garten Buttermilk Pancakes:
- Ingredients: You probably already have everything you need, and if you don’t, you can simply create your buttermilk.
- Easy to Prepare: Only 5 minutes to prepare!
- No one can say no to a stack of light: buttery, and fluffy buttermilk pancakes! Especially with a drizzle of the syrup on top!
What are Buttermilk Pancakes?
Buttermilk pancakes are an American morning staple, but despite its simple ingredient list, too many people opt for the box mix because it’s “easier.” Too many amateur bakers have suffered from dense, flat, or rubbery pancakes, or ones with burned exteriors, uncooked cores, or are just flavorless. Today, we’re going to remedy that with my tried-and-true Ina Garten buttermilk pancake recipe.
Ingredients That You’ll Need:
This Ina Garten recipe is simple and employs cupboard basics, but before we get started, let’s go over a few of the ingredients:
- Buttermilk: When coupled with baking soda, buttermilk provides the pancakes a lovely lift, making them thick and fluffy. Its job isn’t just chemical; it also adds a superb flavor to buttermilk pancakes, giving them a typical yet mild tang. If you don’t have buttermilk, see my FAQ section below for how to create this Ina Garten recipe.
- Eggs: These should ideally be at room temperature. Ideally, all of your ingredients should be at room temperature so that the batter can readily mix, but I’m realistic about the fact that most people aren’t going to wake up two hours early to layout their buttermilk to come I’d never ask you to do anything I wouldn’t do myself, and I’d never ask you to do something I wouldn’t do myself. Fortunately, this dish has a high level of resiliency.
- Butter: This has to be melted. Do this first to allow it to cool before adding it to the buttermilk.
- Baking soda and baking powder The combination of these two leaveners provides the proper fluffiness and lift to the pancakes.
- Flour: I recommend that you use all-purpose flour. You may try using whole wheat flour for some of the flour, but because it is a thirstier flour, you may need to add a little extra buttermilk to keep the batter from becoming too thick. Because the baking powder and salt are already included, self-rising flour is not suggested. This is just a rundown of the items I used and why I utilized them.
What toppings go well with buttermilk pancakes?
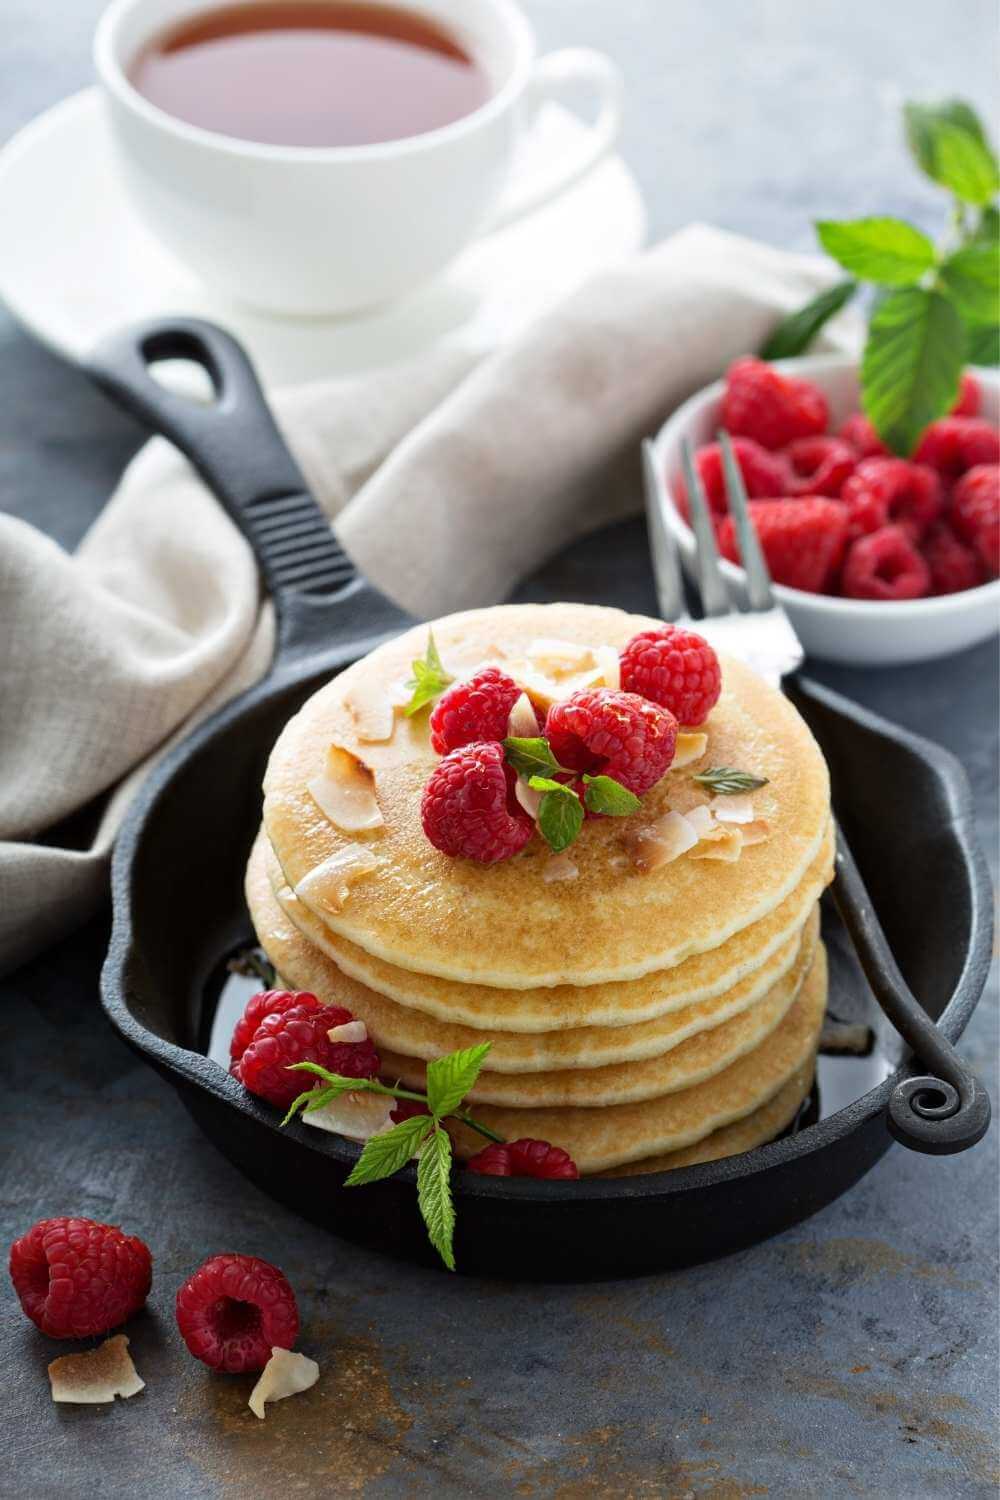
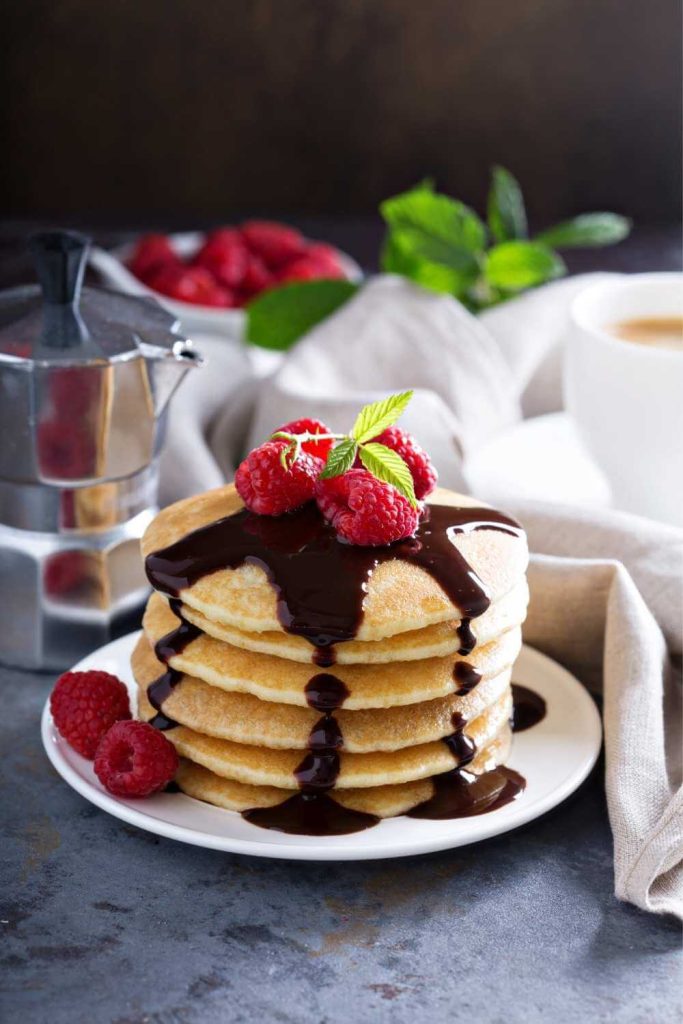
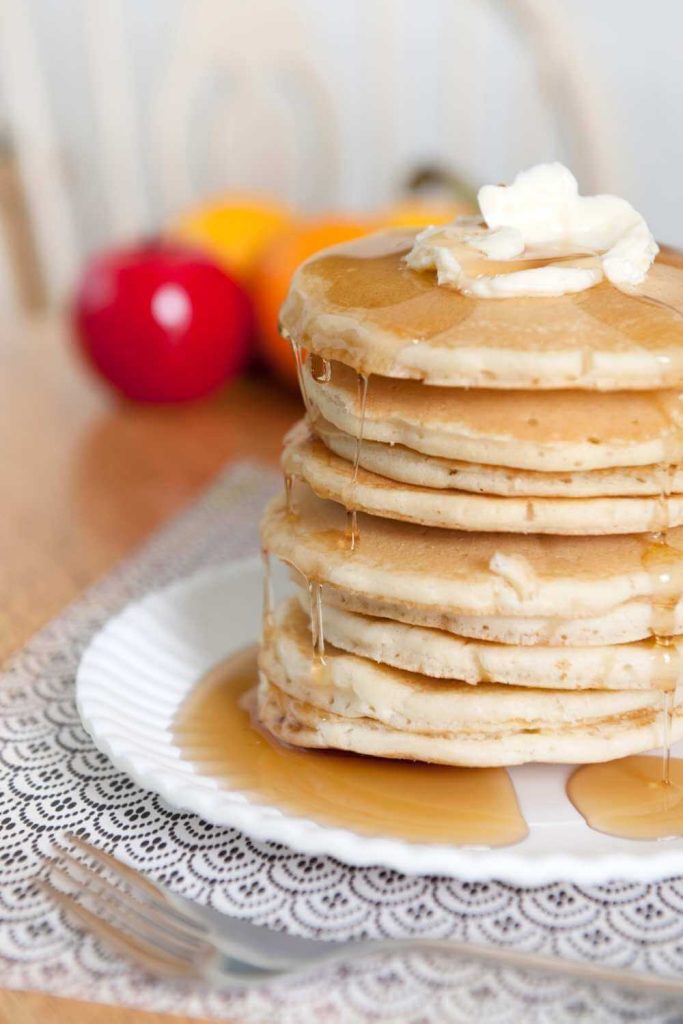
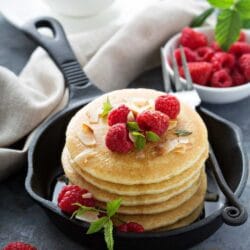
These are delicious with just butter and syrup, but I like to go fancy and add whipped cream, strawberry sauce, blueberry sauce, caramel sauce, chocolate gravy, or hot fudge sauce!
Have you ever had a pancake sundae with ice cream and toppings? It’s not exactly healthy food, but it’s delicious!
How To Make Ina Garten Buttermilk Pancakes?
- In a large mixing basin, combine the flour, sugar, baking powder, baking soda, and salt.
- In a separate medium-sized mixing bowl, combine buttermilk, eggs, and vanilla extract.
- Take your melted butter and gently drip it into the wet components while whisking, swirling until well-combined (the butter may separate and curdle if your other ingredients are cold, this is OK, just whisk to combine).
- Pour liquid ingredients into dry ingredients and stir with a wooden spoon until barely mixed – overmixing your pancake batter will result in flat pancakes. When stirring, use a light touch, and a few flour streaks in the mixture are OK.
- Spray a nonstick pan with cooking spray or brush with canola oil and set it on a medium-low burner.
- Allow the skillet to preheat before adding the batter (about 5 minutes; it’s also a good idea to let your pancake batter sit for several minutes, which is why you prepared it before preheating your pan), and once the skillet is heated (I usually test this by hovering my hand several inches above the pan and making sure I can feel the heat radiating from it), scoop pancake batter into pan (I use about a 12–23 cup of batter per pancake).
- Allow the pancake to cook until the edges start to look done and the bubbles in the batter start to pop. Using a pancake spatula, carefully turn the pancake and cook for several minutes more, or until golden brown.
- Rep until all of the batters have been used — I recommend spraying or coating the pan between batches of pancakes.
- Warm, with salted butter and maple syrup on top!
Recipe Tips
- When the edges of your buttermilk pancakes begin to set and the bubbles in the batter begin to pop, they are ready to flip. At this stage, you should be able to effortlessly turn a spatula beneath and gently pick up one edge to inspect: check for a golden brown hue!
- The batter should not be over-mixed. Resist the impulse to thoroughly combine the pancake batter. It’s fine if it’s a little lumpy with flour streaks. If you over-mix the mixture, gluten develops in the flour, resulting in chewier, rather than fluffy, pancakes.
- Don’t pat the pancakes down. Another temptation to resist is using your flipping spatula to pat down the pancakes as they cook. If you do, you will “squish” the air pockets that help make the pancakes light and fluffy.
- Don’t flip the coin more than once. When you see little bubbles rise to the surface of your pancakes, it’s time to flip. Simply turn it Once frying on the other side until done. It won’t be too long.
What To Serve With Ina Garten Buttermilk Pancakes?
When serving Ina Garten Buttermilk Pancakes for Breakfast, pair them with the following items:
- Maple Syrup
- Bacon Jam Recipe
- Egg Muffins
- Strawberry Syrup
- Peach Cobbler
- Whipped Cream
- Peanut Butter
- Coffee
- Orange Juice
How To Store Ina Garten Buttermilk Pancakes?
In The Fridge:
Refrigerate any leftover Ina Garten Buttermilk Pancakes for 2-3 days.
In The Freezer:
After making your own Ina Garten Buttermilk Pancakes, arrange them in a single layer on a big baking sheet and place it in the freezer. Allow for around 30 minutes for them to set before stacking them in a freezer-safe container or bag and freezing for up to 3 months. The “flash freeze” will prevent them from adhering together.
How To Reheat Ina Garten Buttermilk Pancakes?
In The Oven:
- Wrap foil around any remaining Ina Garten Buttermilk Pancakes.
- Reheat for 3 to 4 minutes at 350°F in the oven.
- It is suggested that Pancakes be cooked to 165°F before serving.
In The Microwave:
- Wrap a moist paper towel over each plate of Ina Garten Buttermilk Pancakes.
- Microwave your Ina Garten Buttermilk Pancakes for 30 seconds, then 20 seconds at a time until warm.
In The Air Fryer:
- Cover the remaining Ina Garten Buttermilk Pancakes with foil and reheat for 3 minutes at 350°F in the air fryer.
- Reheat for 2 minutes, or until cooked through, after removing the foil.
FAQ Section
Yes! Zach and I frequently prepare a half batch of buttermilk pancakes for the morning; the recipe divides effortlessly and the results are the same! 1 cup plus 2 teaspoons buttermilk.
Instead, you may use my buttermilk substitution recipe (you only need milk and vinegar or lemon juice). 2 Tablespoons + 34 teaspoons of white vinegar or lemon juice in a big measuring cup, followed by milk until 2 1/4 cup is reached. Stir.
You should be aware, though, that “homemade” buttermilk is thinner than the actual thing. It’s possible that you don’t need to use the entire 2 1/4 cup, since this will make your batter runny and your pancakes too thin. If you use the alternative, set away roughly 1/2 cup of your buttermilk (so just use 1 1/2 cup) and proceed with the recipe as directed. If the batter appears to be too thick, gently add additional buttermilk replacement as needed.
This is most likely due to over-mixing the batter, which can result in flat, thick, or even rubbery pancakes. I cannot emphasize how crucial it is not to over-mix your pancake batter. Gently mix together the wet and dry ingredients using a spoon or spatula until just incorporated. A few flour streaks in the batter are really beneficial!
Absolutely! To your buttermilk pancake batter, you may add up to a cup of add-ins. Because you don’t want to over-mix your batter, fold them in when your flour is halfway mixed rather than after you’ve mostly combined your wet and dry components.
You may also leave out the mix-ins and top your pancakes with whipped cream or blueberry sauce. I don’t mind if you add mix-ins and fancy toppings!
Ina Garten Buttermilk Pancakes
Ingredients
- 2 cups all-purpose flour (250g)
- 3 tablespoons sugar
- 2 teaspoons baking powder
- ½ teaspoon baking soda
- ½ teaspoon salt
- 2 ¼ cups buttermilk (530ml)
- 2 large eggs lightly beaten, room temperature preferred
- 1 teaspoon vanilla extract
- 4 tablespoons unsalted butter melted and cooled (57g)
Instructions
- In a large mixing basin, combine the flour, sugar, baking powder, baking soda, and salt.
- In a separate medium-sized mixing bowl, combine buttermilk, eggs, and vanilla extract.
- Take your melted butter and gently drip it into the wet components while whisking, swirling until well combined (the butter may separate and curdle if your other ingredients are cold, this is OK, just whisk to combine).
- Pour liquid ingredients into dry ingredients and stir with a wooden spoon until barely mixed – overmixing your pancake batter will result in flat pancakes. When stirring, use a light touch, and a few flour streaks in the mixture are OK.
- Spray a nonstick pan with cooking spray or brush with canola oil and set it on a medium-low burner.
- Allow the skillet to preheat before adding the batter (about 5 minutes; it’s also a good idea to let your pancake batter sit for several minutes, which is why you prepared it before preheating your pan), and once the skillet is heated (I usually test this by hovering my hand several inches above the pan and making sure I can feel the heat radiating from it), scoop pancake batter into pan.
- Allow the pancake to cook until the edges start to look done and the bubbles in the batter start to pop. Using a pancake spatula, carefully turn the pancake and cook for several minutes more, or until golden brown.
- Rep until all of the batters have been used — I recommend spraying or coating the pan between batches of pancakes.
- Serve warm, with salted butter and maple syrup on top!
Notes
- When the edges of your buttermilk pancakes begin to set and the bubbles in the batter begin to pop, they are ready to flip. At this stage, you should be able to effortlessly turn a spatula beneath and gently pick up one edge to inspect: check for a golden brown hue!
- The batter should not be over-mixed. Resist the impulse to thoroughly combine the pancake batter. It’s fine if it’s a little lumpy with flour streaks. If you over-mix the mixture, gluten develops in the flour, resulting in chewier, rather than fluffy, pancakes.
- Don’t pat the pancakes down. Another temptation to resist is using your flipping spatula to pat down the pancakes as they cook. If you do, you will “squish” the air pockets that help make the pancakes light and fluffy.
- Don’t flip the coin more than once. When you see little bubbles rise to the surface of your pancakes, it’s time to flip. Simply turn it once frying on the other side until done. It won’t be too long.
These are the best pancakes I have ever eaten! They are light and fluffy and so delish. A luxurious pancake if there ever was such a thing. Thanks for posting the recipe.
I made these pancakes and they were absolutely delicious. My daughter has a gluten allergy so I used gluten free flour instead of regular all purpose flour. I will definitely be keeping this recipe. Thanks Ina
The BEST pancakes ever!!!! I’ve made them a few times now and each time was perfection. Thanks for helping make beautiful memories!!
Fluffy and absolutely delicious!
So good. Light & airy. Flavor was just perfect. I always like to eat them plain first to see the real flavor. This was delicious.
With all due respect, I find that if I wait until the edges curl and bubbles appear and *then* add my blueberries, it is so much more delicious and attractive. This way the blueberries stay whole, warmed through and soft but whole. Also, the blueberries do not over soften and bleed blue all through the dough. Also, easier and can place the blueberries exactly where you want them.
Hands down, the best pancake recipe ever! Can’t imagine what a better pancake would taste like! They are fluffy, light texture and melt in your mouth.